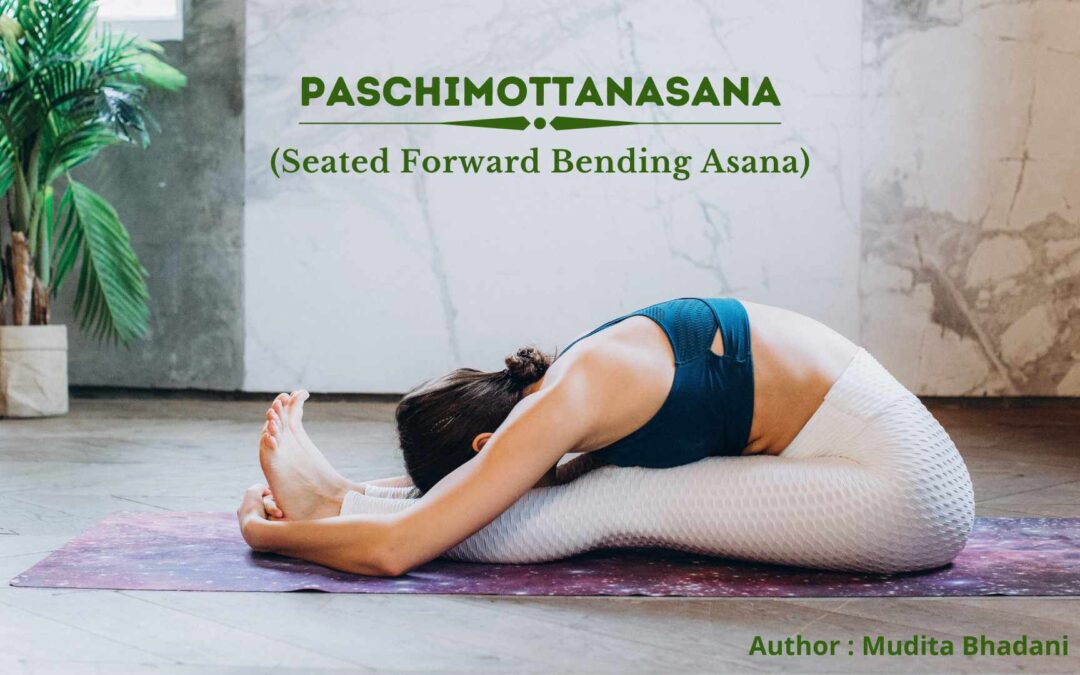
Paschimottanasana is a seated forward bending asana, which involves intense stretching of the legs and back muscles. It is a very simple pose that increases the flexibility of the entire body and tones the lower body. It is said that continuous practice of this pose keeps a body free from diseases. Primarily, it looks like a very easy and simple posture to perform wherein the body bends forward towards the thigh and knees but it requires a great amount of patience to learn and perform this posture correctly.
It is a great posture that calms the mind and helps to concentrate. Personally, it is one of my favorite postures to do as it relaxes the entire body and helps to practice one-pointedness. This posture teaches us to be humble, and flexible and reduces rigidity. Spiritually, this asana is about letting go of your thoughts, and past impressions and surrendering yourself to the ultimate supreme.
Mythology and Origins
The word Paschimottanasana consists of three Sanskrit words, Paschim, Uttana, and Asana. Paschim means “West”, Uttana means “intense stretch” and Asana means “posture”. It literally means a stretch
of the West pose. It is said that the crown represents the north, and the feet represent the south. The front body represents the east and the back of the body represents the west. Therefore, this asana means stretching the back.
It is also called Ugrasana or Brahmacharyasana. Ugra means formidable, powerful, and noble. Brahmacharya means religious study, self-restraint, and celibacy.
Yoga Scripture
As per 17th century Gheranda Samhita, Paschimottanasana is one of the most important 32 postures out of eighty-four lakh postures taught by Siva. Further, as per Hatha Yoga Pradipika, it is the best among all asanas and makes a practitioner free from diseases.
As per verse 28 of Chapter 1 of Hatha Yoga Pradipika and verse 24 of Chapter 2 of Gherand Samhita, Paschimottanasana is “Stretching the legs (in front) on the ground, like a stick; bending forward, holding the toes with both hands and placing the forehead on the knees.
As per verse 29 of the Hatha Yoga Pradipika, Paschimottanasana is the best among asanas. By this asana, the pranic currents rise through Sushumna, the digestive fire increases, the abdomen becomes flat, and the practitioner becomes free from diseases.
Further, this asana has also been explained in Siva Samhita and is called Ugrasana.
Benefits of Paschimottanasana
Posture has a lot of physical and spiritual benefits. Some of the major benefits are as follows:
Physical Benefits
- It stretches the entire body and helps in increasing its flexibility of the entire body.
- It helps in reducing the stiffness of hamstrings, calves, and hips and increases flexibility. It also helps in toning and reduction of excess fat from thighs and hips
- It helps in relaxing and stretching the spine and lower back muscles. It also helps in the reduction of pain and stiffness in the back. It elongates the spine muscles.
- It massages the abdominal muscles, pancreas, spleen, kidney, and liver, which helps in reducing digestive disorders such as constipation, loss of appetite, etc. It also helps in reducing extra fat from abdominal muscles.
- It strengthens the shoulder and arm muscles and helps to reduce tension as these are stretched in a relaxing manner.
- It helps to reduce blood pressure and increases blood circulation in the body, especially in the pelvic muscles.
- It also regulates the blood sugar levels by regulating pancreas function and therefore, is beneficial in diabetes.
- It helps in reducing pains during menstruation and helps to alleviate menstrual problems.
- In case, deep breathing is done while holding in this posture, then it also results in improving the respiratory system.
- Further, deep breathing reduces stress and helps strengthen the immune system.
- It helps to correct the alignment of the body,
- It is the best counter pose for intensive back bending asanas such as Chakrasana, Dhanurasana, Shalabhasana, etc.
Spiritual Benefits
- It helps in the improvement of focus, concentration, and memory.
- It regulates the adrenal gland which helps in relaxes our mind, and body and reduces the stress level
- It helps to increase the awareness of the body.
- It also balances the emotions in the body. It helps to eliminate the old emotional impressions stored in the body
- It creates a flow of energy in the body as the hands and legs are connected to each other which completes the chain.
- It also helps to activate the Manipur Chakra
Preparatory Poses
Some of the preparatory poses are as follows. These postures provide sufficient strength and flexibility in the back and legs so that one gradually achieves the correct posture
- Janu Sirasana
- Baddha Konasana (Butterfly Pose)
- Triang Mukhaikapada Paschimottanasana (One Leg Folded Forward Bend)
- Uttanasana
- Balasana
Who should not do Paschimottanasana?
- People who are suffering from a back injury, slipped disc, hernia or acute digestive problems should avoid doing it as it may worsen the condition.
- People suffering from asthma, respiratory problems, or heart problems should avoid doing it.
- In case you have had surgery recently then also you should avoid doing it as it may open up the stitches.
- Pregnant women should avoid doing it as a lot of pressure is put on the abdomen.
- The posture should not be performed after having meals
- Beginners should do it only under the supervision of a Yoga expert.
Steps to Perform Paschimottanasana
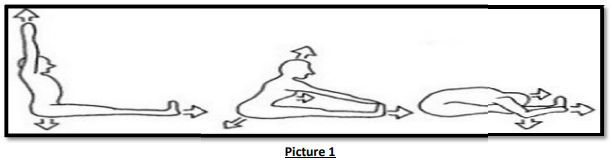
The steps to perform Paschimottanasana are as follows (Picture 1):
- Sit on the floor with your legs stretched out straight forward. Try to keep your feet together.
- Your spine should be elongated and straight. Further, keep your feet active and point your toes
upward. The feet should be placed in a position that is between flexed and pointed. - Inhale and raise your hands upwards. The hands should be placed alongside the ears and should be
kept straight. - Roll down your shoulders and keep your neck elongated. Push your shoulder blade down and
backward. - The chest should be open and your core muscles should be kept tight and engaged.
- Exhale and bend forward from your hip joints and bend forward as much as possible. Try to touch
the nose to the knees and hold your big toe. - Try to hold in this position as much as you can comfortably. You will feel stretching in your calf muscles, hamstrings, spine, and lower back
- You can breathe normally in this posture or can hold your breath. Exhaling will allow you further to bend forward. Try to maintain a connection between body and breathing.
- You can concentrate in the middle of your eyebrows or on the breath in this position.
- Do not bend your knees in the posture. Further, while bending your back should be straight otherwise it can lead to disc bulging.
- To come back to the original position, inhale, leave your toes, raise your head, and come back up with your hands raised upwards.
- Exhale and bring back the hands down to your sides.
To make it more challenging
- Further, to make it a little more challenging, in forward bending while holding your big toe you can pull your elbows insides in a way that it touches the ground.
- In case, you are comfortable doing it, try to move forward and grip the soles or touch your palms to the ground. For further stretching, you can try by clasping one arm with another in the forward bending position.
- You can stretch further by putting some blocks parallel to your sole and then try clasping your hands over those blocks. It will help the body to stretch more.
Counter Pose
- Butterfly pose
- Dandasana
- Setu Bandh asana
Precautions For Beginners
- Do not keep your toes pointing or flexed. It will lead to injuries or pain in the hamstring.
- Do not over-stretch or overstrain your body yourself. Try to hold in a position that is comfortable for you.
- Try to bend from your pelvis. Do not bend from the upper back. Also, do not round up with the back.
- Keep your legs together and engaged.
- Do not bend your knees and keep them straight. Keeps your legs on the ground. Do not elevate it from the ground merely to touch the head to the knees
- Initially knees will be lifted off the floor. In such cases, tighten the leg muscles and pull yourself forward. It will help to keep your knees on the floor.
- Do not put any pressure on the neck.
- Since this asana involves stretching of the entire body, always warm up your body before performing this asana. Otherwise, it will lead to injury/pain, specifically in the hamstrings.
- Perform this asana in the presence of a Yoga expert at the beginning.
Tips For Beginners
- In the starting, you can sit over a cushion or a blanket for the practice.
- You can use a strap or belt to bend forward in the beginning.
- Initially, you can also bend your knees and support them with a block or with the blanket
- In case you are having stiff back and are not able to keep your feet together, you can keep some distance between your feet.
My Personal Experience
As mentioned above, it is one of my favorite asanas out of all forward-bending asanas. As much as I can remember, it was quite easy for me to hold the big toe. The challenging part which tested my patience was being able to touch my nose to the knees and hold it. It took a good amount of practice and time (more than one year) to be able to touch the nose to knees or forehead to legs comfortably and be able to hold it.
Somewhere, this entire process of learning made me calm and focused and helped me to understand my body better. Further, it reduced my digestive problems to a large extent.
There have been various days wherein I used to feel emotionally drained or unstable. At those times,
this posture has been a lifesaver. Holding in this posture for some time and breathing, helped to
reduce the burden and let things go.
Overall, this asana has various health benefits physically and spiritually and everyone should try to
include it in their daily practice.
Caution: This asana should be performed in the presence of a Yoga expert to avoid injuries. Do remember that everybody is different and the impact of asana on everybody is different.
HAPPY DOING YOGA!!
Recent Comments